Who Doesn’t Love Maple Syrup

It’s That Time of Year Again

This post is an excerpt from several posts on my old blog, countrygirllifeonthefarm, but it’s the right time of year to show up again. 

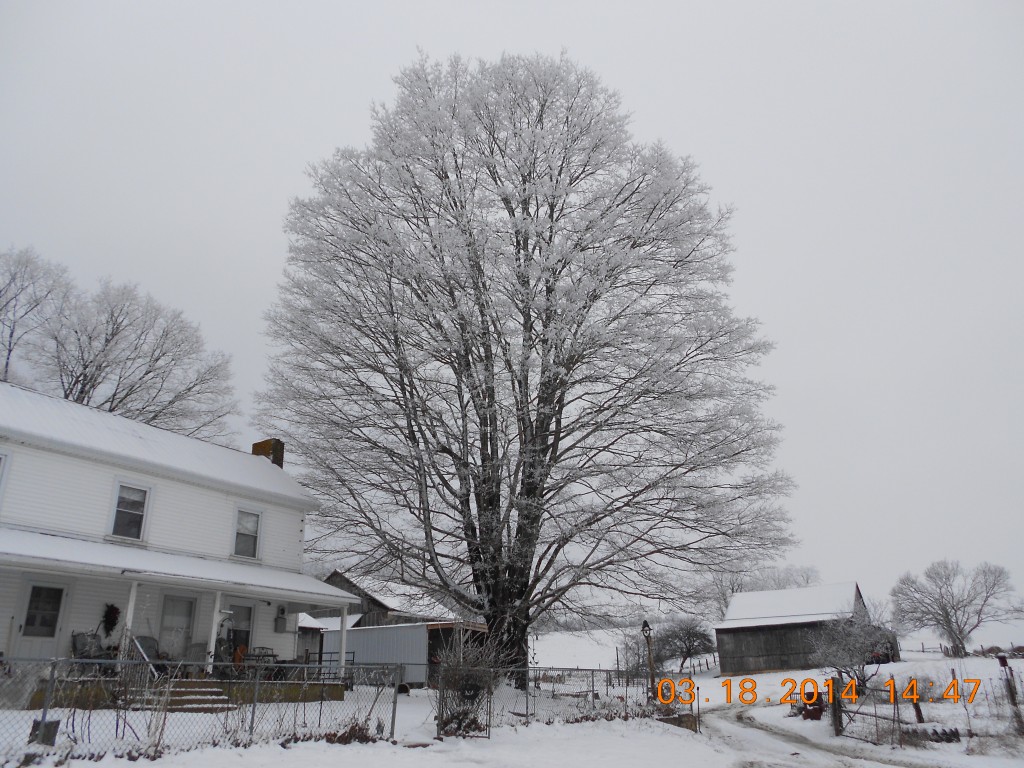
If you have a maple tree in your back yard you can make your own maple syrup just like we do (in a condensed version)!  It takes 40 gallons of sap to make one gallon of syrup or 20 gallons makes two quarts.  You could cook it off on the stove in your home.  You don’t have to have a sugar house to make your own syrup.

Here’s the instructions we use to make it in the sugar house:

First, watch for the right time and to do that you have to have a sugar maple tree of at least 15″-20″ across the girth of the tree (not circumference). In late February or early March wait for very sunny days and below freezing nights. When this happens the sap will begin to move up the tree from the roots. They’re sucking water out of the ground up through the body of the tree.

Second, prepare your sap taps! The first ones I ever made, my Dad showed me how by cutting a 6″ limb from an elderberry bush. We carved all the bark and stuck a crochet needle through the little limb pushing the soft bark through to the other end. This limb is very soft and porous and will easily push out. You don’t have to wait until spring to do this. In the fall when the berries and leave have fell off the limbs you can cut the limbs then and make the tubes.   BUT, you can also buy the taps (sometimes called spiles) from old country stores (Lehmans) and I have found some at hardware stores or maple festivals. BUT, if you are making your own, continue on to clean out the 6″ limb until it’s fairly smooth and has a good hole for the sap to drain through.  We also use these plastic plumbing tees that allow us to hang the bucket from just like the metal spiles.  The tees are much cheaper!  Both last for a long time when cared for and the tees are easier to clean at the end of the sap season.

There are many types of spiles/taps to be found.

Next your going to drill two or three holes around the trunk of the trees about 20-36 inches off the ground using a 3/8″ drill bit (match the drill bit to your tap) about 3/4″ to 1″ into the trees.   DON’T WORRY, THIS DOES NOT HURT THE TREE!  The holes heal over within a month after the sap season.


Place the tap into the tree making sure it’s tight. If it’s not tight the sap will leak out around the tap and your wonderful sap is creeping down the side of the tree instead of out the tap into the bucket.


If the trees have thawed enough and the sun is hitting them the sap will immediately start dripping from the spout/tap (spile).  Just for fun, stick your finger under the drip and get a taste. It will taste just like cold water. It’s after the cooking that it starts to taste sweet. Also, at this stage it will be somewhat sticky. Let it drip all day and if it’s a good day (below freezing the night before and very sunny come morning) you might want to check that bucket under the tap several times during the day.  Once the sap starts running good, your gallon bucket could be full and running over within a couple hours.

We use metal coffee cans for the gathering buckets. I use a nail to tap a hole in the top on each side of the bucket and run a thin wire through and knot for the bail of the bucket. The gallon cans aren’t so heavy that they’ll pull the taps out of the tree if they get full and they will  get full and run over. We keep old milk cans between the trees for holding the sap each day and we keep a milkcan on the ATV for gathering when the trees are some distance apart.  At the end of the day we empty all the cans into the big holding tank.

All of the sap is stored in this tank and kept in the garage so it will stay cold and fresh until time to cook it off.


The tank holds 210 gallons and it was specifically purchased just for sugar maple processing!!

A regular garden/water hose will attach to the faucet when we’re ready to fill the pans.

None of the process is hard but it keeps us quite busy emptying buckets all day long. We have maple trees all over the farm and some are over a hundred years old!

The taps will freeze up during the night and that’s okay. Usually by 9:00 A.M. on sunny mornings  the taps are dripping again and by noon on really warm up days we will have to empty all the buckets at least three or four times. We usually tap 10 to 20 trees each spring, weather permitting.   A few years back we bought a 250 gallon water tank and when the sap is running good,  it’s full in  about  7 to 10 days.   Then it’s time to start making syrup. 


Did I mention that a week prior to all the gathering we bring in a pickup load of four-foot firewood for the firepit. Once the sap is gathered Eddie gets the fire started in the sugar house and starts pouring the sap in the pan over the firepit. We have all of this under roof because most of the time the wind is howling, it’s snowing, it’s raining, very cold and occasionally a beautiful day!        

As soon as the fire gets started, the sap is poured into all four panels of the sugar pan. This is done quickly so as not to scorch the pan or burn the sap.

Now the cooking begins!  We have time now to fill up more milkcans or clean out the ones we’ve used. It all depends on how frisky everyone is and how good the sap is still running. The cooker is watched carefully once it starts boiling and the foam that builds up on the top is dipped off and thrown into a bucket. The foam can make it strong but the honeybees love it and we share those leftovers with them for extra food at this time of year. As the sap cooks off it will become thick and it’s moved from the larger panels of the pan into the smaller panel at the end of the pan where it gets thicker and thicker and sweeter and sweeter.


Reading this and looking at the pictures can be deceptive. This whole process of cooking can take as much as two days of working day and night. Shift work between all of us keeps everyone from getting tired too soon and making mistakes or deciding to take the syrup off too soon!! As the sap cooks and boils down, it is moved into the smaller pan gradually and watching the smaller panel is very critical. After about 100 gallons of sap has been cooked and moved, it is left to cook quickly and to thicken. When we begin it runs out of the dipper like water but near the end of the process it runs out like thin syrup and it gets sweeter the thicker it gets. While this is happening in the smaller panel, the other two panels are kept full and cooking. The clear sap will start turning a beautiful amber-to-topaz color and we just keep adding the sap while the smaller panel syrup is ready to take out of the pan.

There is a plug and drain line at the end of the small panel and we have a very large stainless steel pot ready to drain the finished syrup into. We don’t use any thermometers, hydrometers or fancy gadgets to test the syrup. We’ve just learned to take it off by the consistency and taste of the syrup along with the color. This process of taking off the syrup is quick with several hands helping. The syrup must be moved quickly, plug the hose, and pour boiling sap from the larger pans to keep the pan from scorching. If it scorches we’ll have black burn flakes floating in the syrup at finish.

During the cooking process, foam builds on top of the liquid and we use scoops and wooden scrapers to gather and dip it from the boiling sap. 

The scrapers are used to push the foam buildup to one side of the pan and then it’s scooped out into a bucket.
It’s very important to keep the foam off or the sap could have a bitter taste.


Once the first batch is in the pot I take it to the house and strain it four or five times through 10-15 layers of cheesecloth and set aside to cool. This is also a fun part of the process because I have made fresh bread the day before, gathered a couple dozen eggs and prepare to make a batch of delicious french toast and serve to all the helpers. Of course, everyone pours lots of “fresh from the sugar house” maple syrup over their toast.

 While the second batch is cooking in the sugar house, we let the first batch cool and settlement from the batch settles at the bottom of the stainless steel pot. The settlement is actually maple sugar that can be separated at the end of the process, pour into a sheet pan and left to harden for snacking later. Talk about a sugar rush!!! It looks like harden brown sugar and tastes much like it too. Each time the syrup cools and settles, we run the syrup through cheesecloth again and keep the “sugar candy” separate. After three or four more heatings on the stove and three or four strainings, the syrup is ready to can. It will be boiling hot when it comes off the stove and poured in the sterilized jars. The jars are capped and the boiling syrup seals the jars.

 We make sure that everyone that helped with the process is sent home with a jar of syrup, we sell better than half of the jars and we keep some for family/personal use for the rest of the year or until the next season.

What To Do With a Bushel of Apples

We love apples and prepare them in many ways especially when they’re starting to deteriorate. At that time, you have to move quick. Here’s some ideas for you:

Morning Glory Muffins

Fresh Apple Cake

Applesauce

Fresh Apple Cake/Muffins

Classic Apple Pie

Baked Apples

Apple Crisp

Apple Butter

These are all my favorites and most of the recipes are found on my cooking page of this blog. Check out this link, https://hercountryways.blog/home/come-cook-with-me/ and scroll to the DESSERTS section at the bottom of the page. Enjoy!

A Day on The Farm During and Preparing for A Winter Storm

A winter storm for us can mean several days of temperatures in the teens or single digits, can mean a day or four of rain, sleet and snow, can mean 30+ mph winds for 2-4 days, can mean one, two, four inches of snow for several days or an accumulation of all of the above.

We don’t travel much at all especially with any of these weather events but farming means working on the farm during these events. There is no farm closing!!!

The animals first and foremost!!! The cattle are fed before the storm hits in the woods where there’s shelter from the trees and if the storm comes during the night, they’re fed early afternoon. A normal day they’re fed in the morning and given round bales of hay (one for small herds, two for larger herds). Most of the cattle are getting water from our mountain springs but one herd gets theirs from a large pond and we have to go every hour or two and break the ice for them. 

If calving time has begun (end of February) the mothers are checked every couple hours and if they’re “springing” we check them more often. When baby calves are first born it’s very important that their mama starts cleaning them and coaxing them to get on their feet and nurse as soon as possible. Frigid air and a wet coat will kill them fast. If there’s a problem we bring them to our back porch, rub them dry, cover with warmed blanket, get a heat lamp on them and a bottle of warm milk replacer in them to keep them alive. I add a 1/4 cup of maple syrup to their bottle to make it sweet and the calves are quicker to accept something sweet in that bottle. After we get the calf warm, strong and on his feet, we take him back to his mama and pray she’ll take him back quick.

The dogs are taken warm water twice a day, fed a little extra than they normally get and their beds are over-stuffed with fresh hay. Our dogs are kept in the barn that’s close to the house and they have igloo houses in the barn where it’s dry and out of the wind, rain and snow. Eddie takes care of his dogs, Mischief and Butch, and I take care of Sadie. Sadie stays in the house especially when there’s lots of wind. She normally sleeps on her bed at the foot of our bed even in the summertime.

The chickens are my job. They have full feeders of 20% protein laying crumbles (wintertime only), scratch feed and black oil sunflower seeds in the hen house. I take them warm water every two hours when the temps are below freezing and gather the eggs each time I’m in the henhouse to prevent them from freezing. We don’t have heat or lights in the coop, but my girls continue to lay those beautiful eggs. They have fresh hay in the nests and layers of leaves on the floor. They can go in and out of the coop during the day but if there’s snow on the ground they rarely come out into the pen.

They have a cinderblock building and windows for ventilation.

When we know ahead of time of an approaching storm, we fill the front porch with dry firewood for heat and Eddie takes our gas jugs to town and fill them for the chainsaws (for fallen limbs) and snowblowers. He takes all of the propane tanks to be filled at the same time for the heaters we put in the cellar and laundry room. I fill two 5-gallonbuckets with water for flushing the toilet in the event we might lose power. I keep all of my oil lamps full and large candles for lights. We keep the wood rack by the stove filled and I prepare our meals (usually a large pot of venison stew or chili) on the woodstove. If the power is out more than 24 hours, we bring the generator from the garage and run it long enough to keep the freezers from thawing and the water pump going to fill the containers we’ve used and keep the water lines from freezing.

We stay prepared!!! Are you ready for a winter storm event??

Canned Tomatoes To Pasta Sauce

Summer 2022 was not as productive in our garden as we would have liked due to late frosts and freezes and draught late. We planted about twenty different tomato plants, Mr. Stripey, San Marazano and some Virginia sweets. They didn’t produce like they normally do but I did get enough to can 15 jars of Mr. Stripey. They are normally a very large yellow with red streaks and very little acid. Neither of us can tolerate the acid in tomatoes but these do the trick. 

Canned whole Mr. Stripey tomatoes.

I don’t use a lot of canned tomatoes except in soup, but I do like to have barbecue sauce, pasta sauce and pizza sauce on hand. A few weeks ago, I brought the fifteen pints of canned tomatoes out of the cellar and made pasta sauce. 

It’s really simple to make using Mrs. Wages Pasta sauce mix. I poured all of the tomatoes in a large stainless-steel pot; added some finely diced onions and pressed garlic cloves, salt and pepper and heated to boiling. I stirred it several times to make sure the tomatoes didn’t stick. Then I ran it through my food mill into another stainless-steel pot. From here I followed the instructions on the Mrs. Wages envelope which meant pouring the package into the pot of strained juice and put it back on the stove stirring frequently and letting it cook down until it was the perfect thickness. This left me with ten perfect and delicious jars of pasta sauce.

Homemade pasta sauce can be adjusted to your taste as it’s cooking. When I make a pasta dish, I usually add some meat such as ground venison cooked thoroughly.

Saving Apple Seeds

A few years ago, I saved some seeds from our favorite apples. I planted those seeds the first year we had the greenhouse and I was truly surprised that they sprouted within two weeks and grew all summer. 

Apple seeds to be sown in spring 2024.
Three of my first from seed.I think I planted about 20 that year.

I know that growing from seed won’t give us the “true tree” the seed came from, but it will give us some characteristics of that tree, such as size. We planted those trees three years later for root stock. I over-wintered them in the basement of an old house on the property to keep them cool and away from deer and rabbits. I wanted them to have a really good root system before we planted them in the ground. 

Pink ribbon denotes the apple tree at two years old.

We lost two of the trees the first year in the ground due to rodents eating the bark and two more last summer due to drought, even though I watered them during the summer months.

This year we want to move them to the orchard behind the house and graft them to our Wolf River apple scion. Scion is a twig containing buds from a woody plant that is grafted onto the stock of another plant. This twig will be grafted to our little trees and if it lives, we will have Wolf River apples on new stock.

These are the last Wolf River apples we picked about three years ago.

We’ve lost lots of apple trees in the last ten years to age, wind, and gypsy moths. Trees we’ve purchased from big box stores for replacements rarely make it but sprouts that come up randomly on the farm, grow and survive. They’re not always growing in an area that’s productive for our farming such as hayfields, loading pens, along fencing, etc. We have dug up a few of those and they’ve lived we think because they’re from seed that has adapted to our weather extremes.

This is one of the yellow delicious that we purchased, and it lived three years.

We have three apples we’re hoping to graft this spring and they are Wolf River, Arkansas Black and Transparent. We also have McIntosh, Mammoth Pippin, Starks, and Winesap. All of these make wonderful apple pies and awesome for cider. We use our apples for cider, juice, apple butter, and applesauce, among other things.

The last three spring we only got a few apples due to late frosts and freezes while the trees were budding. Fall 2023 left us with no apples which made us very unhappy and so were the deer, rabbits and other wild animals.

Luckily, I had frozen lots of applesauce and in 2022 we bought “horse” apples from an orchard nearby for cider and juice. Horse apples are sacks of apples that orchards purge from their baskets because they’re not “perfect”. They me be small in size, imperfect shape or slightly bruised. There’s nothing wrong with them but they’re perfect for cider and juice.

My advice, plant those seeds, grow root stock, and check with friends or acquaintances for their favorite scion limbs to graft to your root stock. Apple trees are beautiful shade trees and the smell of apple tree blooms in the spring is heavenly!!! 

One of our largest orchards with old apples and they’re gorgeous in the spring.

If we have a good spring and get to graft our young trees, I’ll write a post with pictures and instructions.